Winterizing an RV: The easy way

I know we've talked a lot about winterizing over the past few weeks. But here's one more report, this one documenting my do-it-yourself winterizing of my Roadtrek eTrek.
For the past two years, I've paid over $100 to have it winterized by RV service dealers.
From the blog and our Facebook page, readers have told me that it's no big deal and it it is something that even an unhandy handyman like me can do.
So this year, I decided to see take their advice and do my own winterizing.
I've read all the various suggestions and methods of winterizing an RV and, especially, winterizing a Roadtrek motorhome. I've talked to three big service centers at Roadtrek dealerships and I've studied the “official” suggestions of Roadtrek.
Based on those discussions and the suggestions I received, this is my DIY approach:
It started with a firm decision NOT to put antifreeze in the fresh water tank. Some people do. The dealerships I consulted urged me not to do that for the simple reason that getting rid of that sickly sweet antifreeze taste come time to unwinterize in the spring is very difficult to do.
Needless to say, I throughly drained my fresh water tank, even driving around with the drain valve opened on the trip home from my last outing. That, all three service shops insisted, was all I needed to do for the fresh water tank.
My winterizing approach involved two special tools:

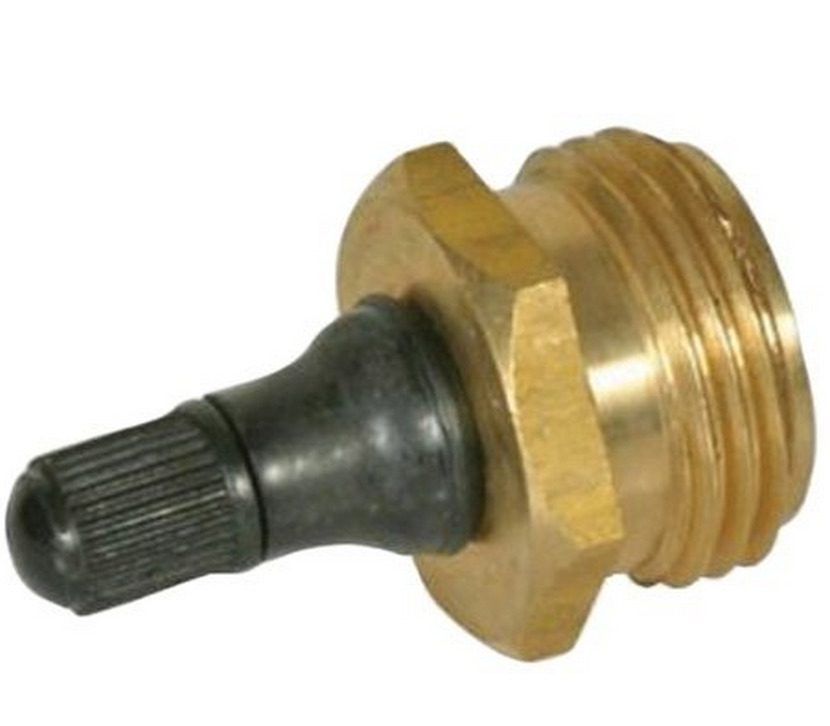
1) The Camco 36153 RV Brass Blow Out Plug, available for just over $5 from Amazon or a bit more at my local RV dealer. This little plug screws into the city water hookup. I need to point out although all three Roadtrek dealers I consulted DO use compressed air, under 40 psi, to blow out the line, Roadtrek itself does NOT recommend forcing compressed air back through the lines. But I do see the wisdom of pushing what water may be in the lines back to through the faucets so I attached a bicycle pump. It did indeed push some water out the faucets and down the drain so I feel good about that, knowing I did not run air at high pressure and, as Roadtrek warns with compressed air, run the risk of damaging the plumbing.

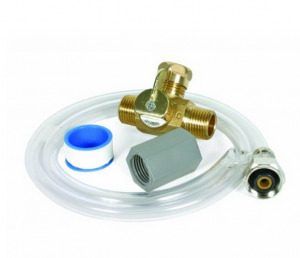
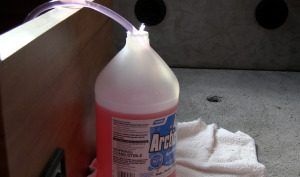
2) The Camco 36543 RV Pump Converter Winterizing Kit. This is a little valve that attaches at the water pump and allows you to siphon water directly from a bottle of antifreeze into the RV pipes and out the faucets, thereby protecting pipes and connections. This is very clean and neat and makes winterizing so easy, especially if, as I plan, I will probably have to winterize several times this season as I drive to warm climates and then return to the cold north. Cost is $12.65 through Amazon.

I did the above video to show how it all works. Total time was bout 20 minutes, and that was with me doing the video as I went through each stage. I used just under three gallons of antifreeze, making sure it ran through all the faucets, flushed through the toilet and also flowed through the cold and hot water filters and my outdoor shower. I also removed the water filter, which will be replaced by a fresh one in the spring.
After that, I put about a cup down each trap. I once again dumped the black and grey water tanks, running the macerator and making sure pink stuff came out. Finished with that, I dumped a half gallon of antifreeze down the black and grey tanks.
These general steps will work with just about any RV.
My eTrek has a special Webosto water heater and I followed Roadtrek's suggestion to drain the tank of water. That's pretty much all it needs. Your heater is probably much different and you should consult your instruction manual for specifics.
Now I'm ready for cold weather. Jennifer and I will still use the eTrek during the cold months. We just won't run water through the pipes in cold weather. We will use antifreeze to flush the toilet.
But as the temperature drops, the eTrek is now ready for Old Man Winter. Bring it on.

AntiFreeze, why pay when you can use air pressure free , I have used this for many years and no problems also saved a lot of money
I see Tom is using that air too.
You can pressurize your water lines with compressed air to the same PSI listed by the manufacturer for water supplies. My compressor has a pressure regulator that guarantees that I do not overpressurize the lines. You should also get yourself a spring-loaded air chuck adapter, or, better yet, a Camco 36143 Blow Out Plug with Brass Quick Connect:
http://www.amazon.com/gp/product/B002XL2IEA?psc=1&redirect=true&ref_=oh_aui_detailpage_o00_s00
I get all of the water out of the lines by this method, which means I don’t have to run antifreeze thru the lines. I do put a cup of antifreeze into each trap. I have done this for years w/o any problems whatsoever.
Pretty much winterizing 101
I blow air thru my lines and dump a cup of rv antifreeze down each drain and also in the toilet. never had a problem!
2 good things about Florida:
1) we don’t have to do this 🙂
2) camping is 12 months a year 🙂
I do it the way they showed but i turn the valves, not sure why they called them switches.
I use the pink stuff. I’ve never had a problem in 7 yrs
I’ve been through this process a few times.
Clay Nichols
Best way is head someplace warmer and keep using it. #RVLife RoadTripWithTheWilkes
Je connaît
I have read that the winterizing kit valve may not be a full port valve thus limiting the flow of water during normal use. To anyone who has this kit installed, do you experience any reduction in flow of water?
Thank you Mike Wendland… went to my local Camping World today after reading your report and bout the valve and kit… paid about $1 more for each than you did. Then I came home and followed your video. Used three gallons.
It worked great! Saved us $89!
Don’t thank Mike you just spent more money than you needed too.
Ethylene glycol, the active ingredient in antifreeze is highly toxic to humans. I would not recommend using it in the potable water system. It would be much safer and healthier to open, and leave open, all the faucets, and drain all the tanks and blow out any water caught in the low spots of the pipes with a little compressed air. You don’t even have to remove all the water, just enough that there is room for expansion when it freezes. If your system isn’t damaged by water pressure, why would it be damaged by air pressure?
Ron, you are correct, ethylene glycol is highly toxic and should never be used in an RV water system. RV antifreeze, which is normally propylene glycol, should be used instead. Still, I prefer to carry separate drinking water.
Regarding pressure, most RV systems can only handle 50 to 60 psi max and a water pressure regulator should always be used when hooking to city water. Many air compressors can reach 90 to 120 psi so unless you have an air pressure regulator you trust to not exceed 50 psi or so (don’t use a water pressure regulator for air as I’ve seen some people do), you could apply too much pressure to the system.
Keeping at least one faucet open BEFORE applying pressure can also help prevent over-pressurizing the system. Remove the air pressure first, then close the valve and open the next one — that way air pressure doesn’t have a chance to build up in the system. I prefer using a bicycle pump as it gives more control. Most RV plumping is small-diameter so you don’t need as much volume.
Ron you are right , I see nobody on here.
Very neat ad slick. I’d be inclined to do it that way with my ERA as well. Haven’t tried the high pressure compressor, but a small, even hand held pump might work nicely.
Now that I have winterized for the past two years it is pretty straight forward. And to think that t he dealer wanted $89.00 plus taxes to do the job. 🙂